MarkUs's Grading Interface
When you login to MarkUs with Grader Role, you will see something like this: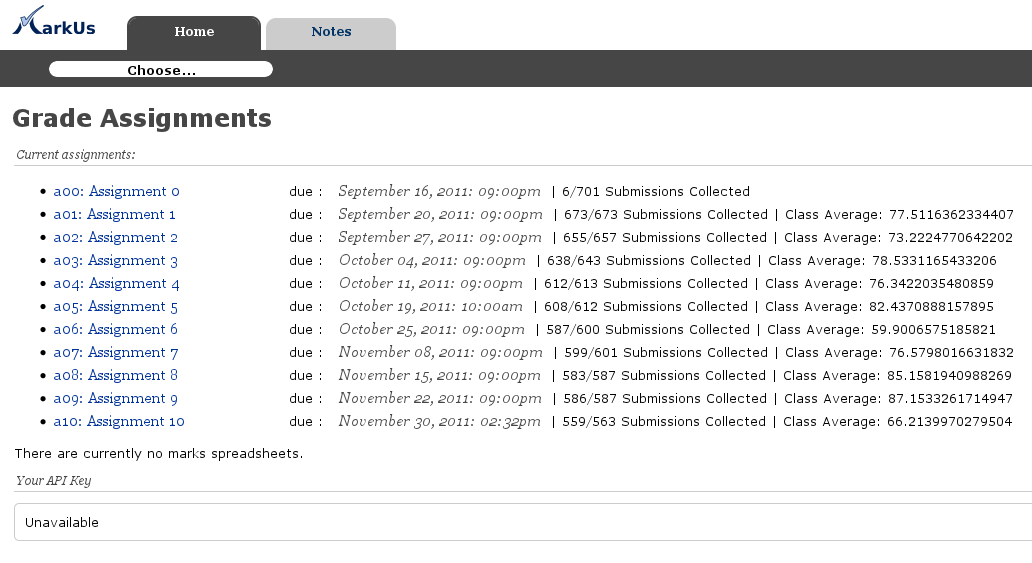
_Figure 1: The Grader Role homepage._ Click on the assignment you want to mark. You will see a list of all the submissions you have to mark.
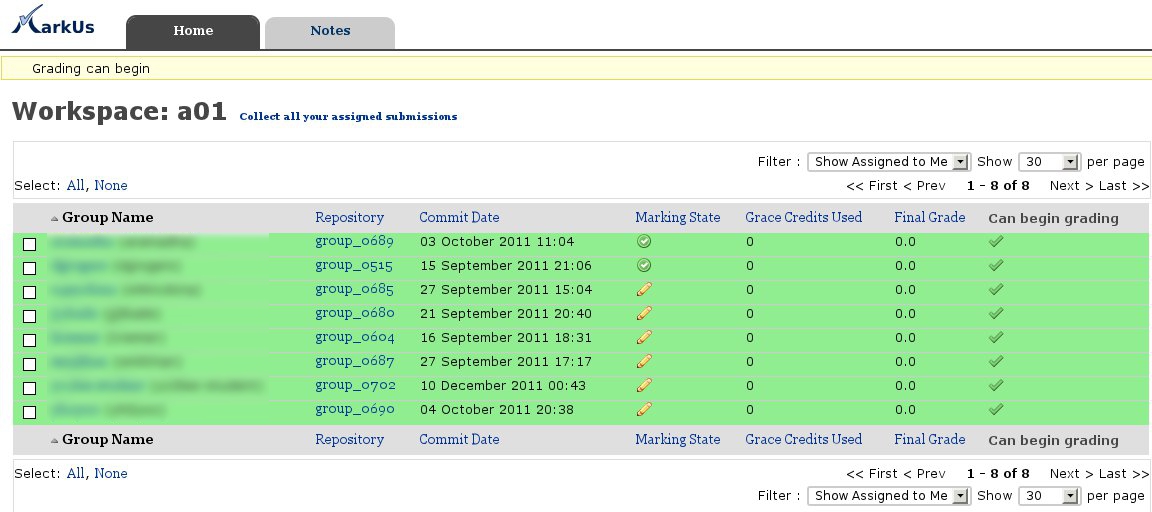
_Figure 2: The list of submissions you have to mark._ The "Marking State" column shows whether the submission is still being marked (
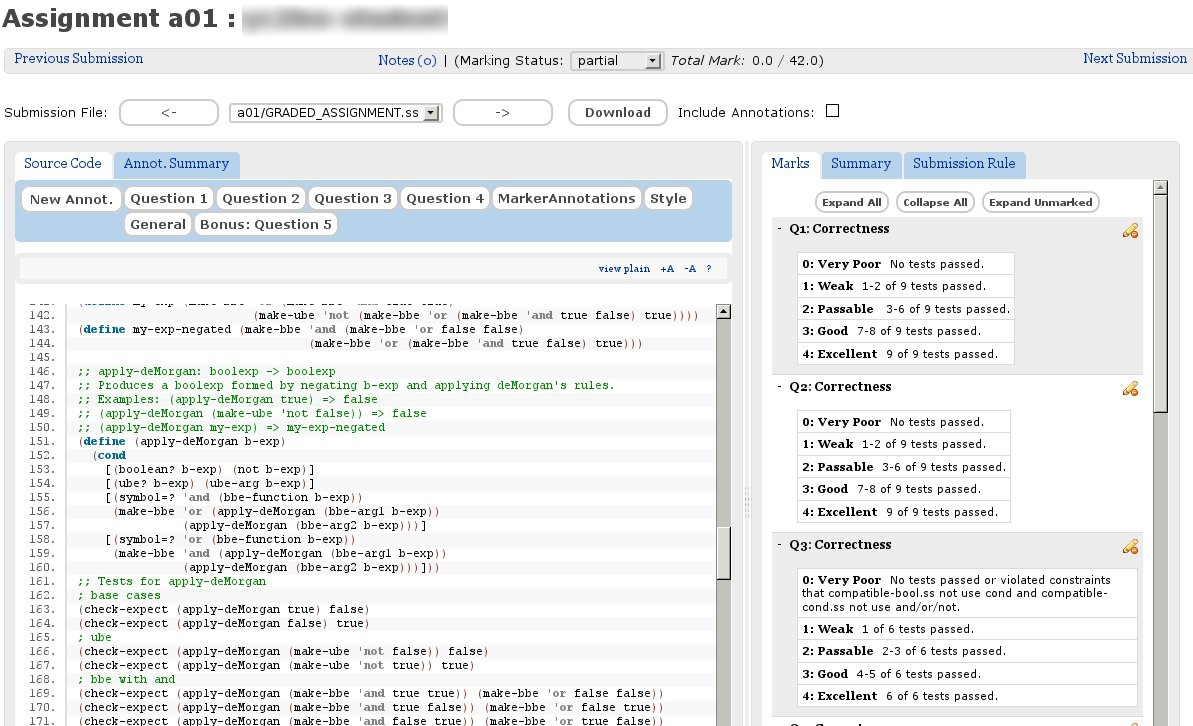
_Figure 3: The grading interface._ The grading interface has three main parts: the student's code, the marking scheme, and the annotations bar. The student's code is displayed at the bottom-left. The text displayed is the contents of the file chosen in the drop-down menu labelled Submission File (near the top). You should always mark from the GRADED_ASSIGNMENT.ss file. At the right is the marking scheme. MarkUs has two types of marking schemes: rubric and flexible. The marking scheme shown above is a rubric. For rubrics, you assign marks by clicking a level for each criteria. You can read the descriptions to decide which level to assign. You should also follow any extra instructions given by professors. You may want to make comments while marking. In MarkUs, written comments are called annotations, and the blue bar at the top is the annotations bar. You can make an annotation by highlighting the code you want to comment on, and then clicking the New Annot. button. The following box will pop up. The text box will be empty initially.
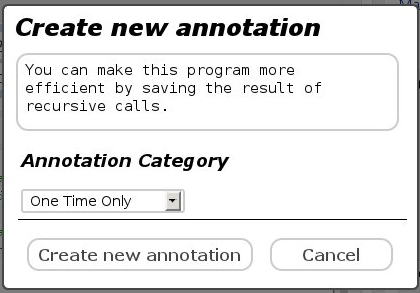
_Figure 4: Creating a new annotation._ You can type in an annotation and then click the Create new annotation button. The student's code will be highlighted in yellow, like below. If the mouse is placed over the yellow region, the annotation will appear.
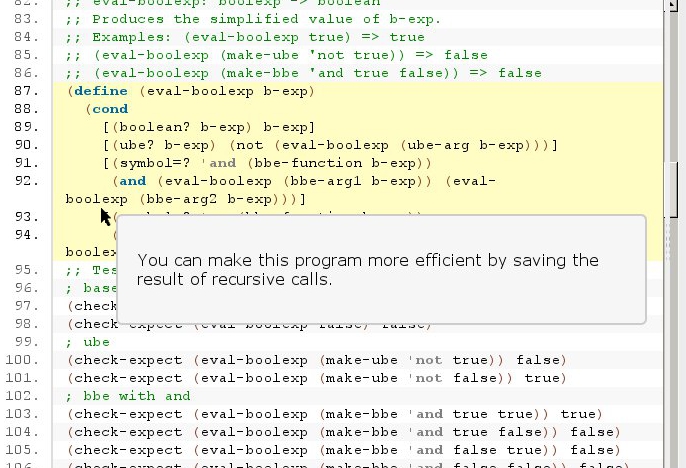
_Figure 5: You can view annotations by putting your mouse over the yellow region._ MarkUs lets you save annotations so that you don't have to type the same annotation again and again. This feature is useful when students are all making similar mistakes. In the annotation bar, there are some buttons which are actually drop-down menus containing saved annotations (see below). You can use one of the saved annotations by highlighting some code, clicking on a drop-down menu, and choosing an annotation. If the annotations drop-down menu doesn't appear, make sure you are using Firefox.
_Figure 6: The annotations drop-down menu._ In Figure 4, there is a drop-down menu labelled Annotation Category. You can use that drop-down menu to save the annotation. If an annotation is saved, it will be added to one of the drop-down menus. Choosing One Time Only means that the annotation will not be saved. Saved annotations are shared among all the graders. If one grader saves an annotation, all the other graders have access to that annotation. Once an annotation is added to the drop- down menu, it can only be deleted from the annotations page in the Admin Role. Also, the annotations are not sorted in any way. If you add too many annotations, the drop-down menu will become very cluttered. Before you add an annotation, check if there's already an annotation that says the same thing. It's a good idea to read through all the annotations before you start marking. You can remove and edit annotations by clicking the Annot. Summary tab above the annotations bar. The annotations summary (below) lists all the annotations that have been made on the assignment being marked. Removing an annotation will erase it from the student's code. It will not delete the annotation from the drop-down menu.
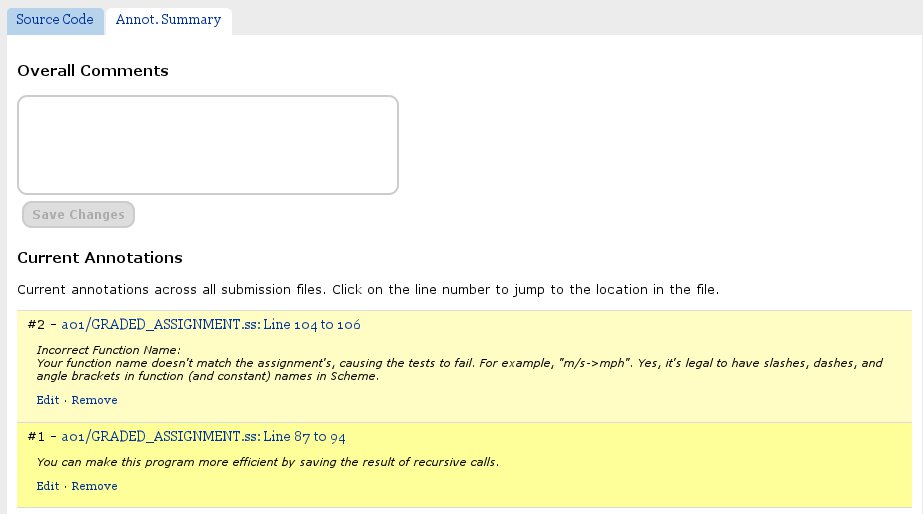
_Figure 7: The annotations summary._ In the overall comments box, you can put an overall comment such as Good Job! The box can also be left empty. The overall comment will be displayed on the student's MarkUs homepage. At the left, there is a "Summary" tab that breaks down the marks. You can add a Bonus Mark or Deduction from here (click "Add Extra Mark").
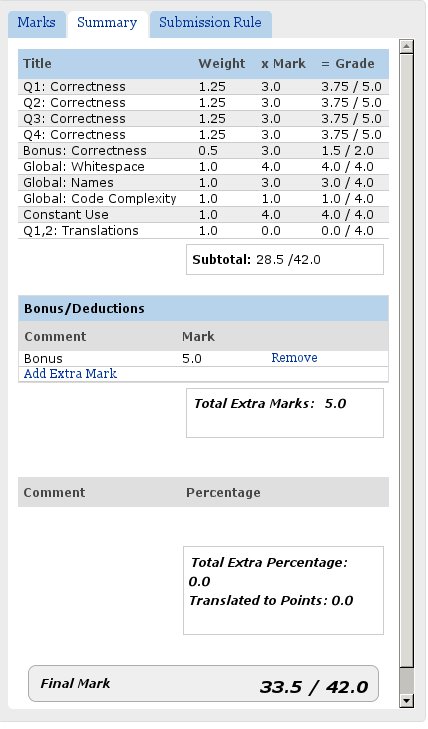
_Figure 8: The summary tab breaks down the marks._ When an assignment is fully marked, the marking state should be changed to complete. The marking state can be changed with the drop-down menu at the very top of the grading interface (see Figure 3). Once you finished marking an assignment, you can move to the next one by clicking "Next Submission" link at the top-right (see Figure 3).
 |
|
Ideas, requests, problems regarding TWiki? Send feedback